Manual deployment processes
[!IMPORTANT]
This is not my favorite way of doing things at all. I just did it since I wanted to get a feeling of the steps you usually need to take.
Here we use Nginx, and NodeJS.
- Launch an EC2 instance.
- If you have not done it while creating EC2 now you can assign a new security group to your EC2 to open its port 80 to the public.
-
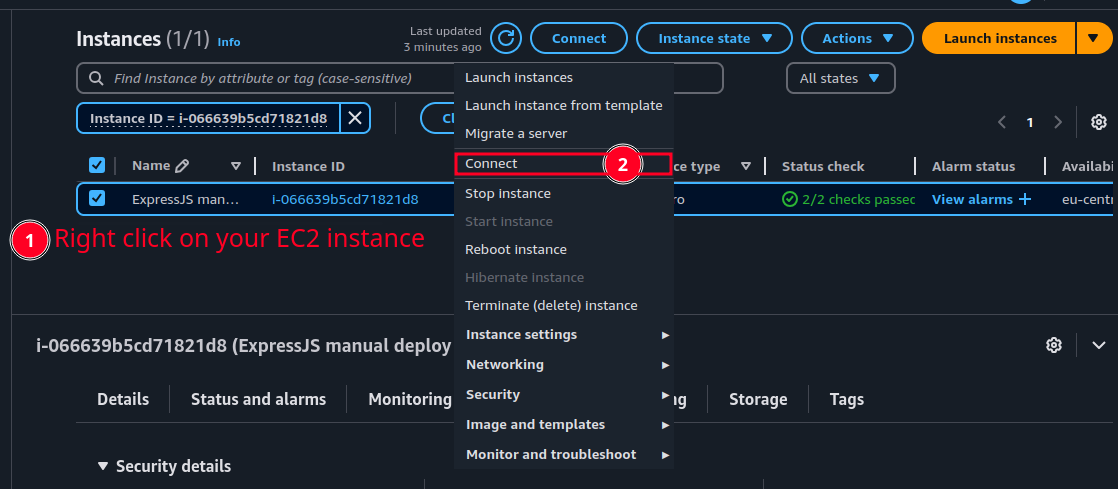
Now ssh to your EC2 instance via the
YourPrivate.pemkey. To do that:-
Right click on your EC2 instance and click on connect:
-
And in the new tab click on “SSH client”, and there you can find a copy button next to a ssh command with the appropriate key, username and hostname. But if it needs some modifications do not be shy:
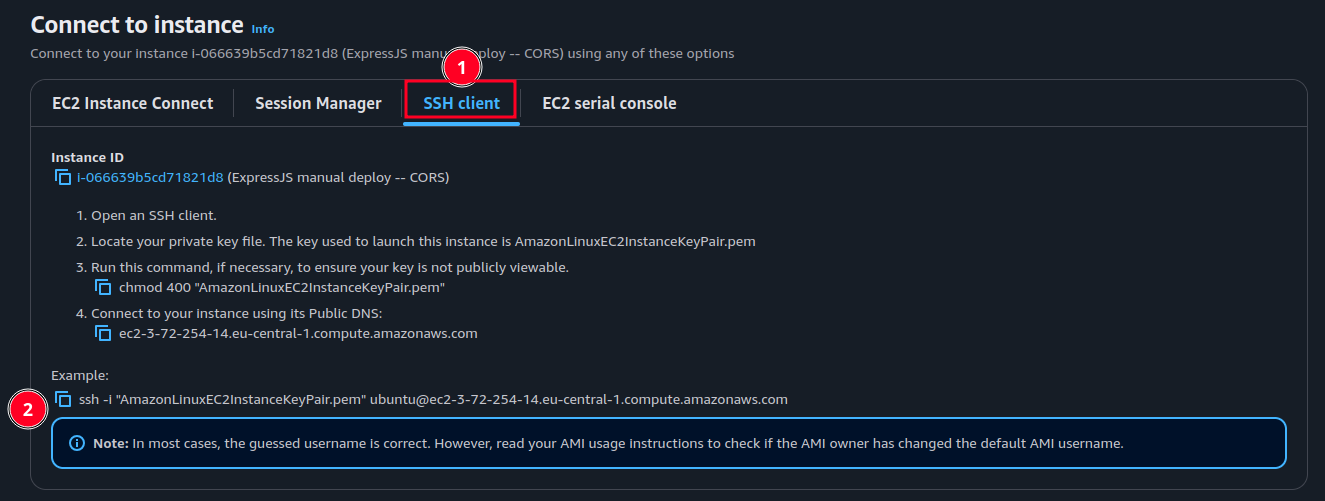
-
- Now head yo your terminal and paste the copied command (make sure your key is located in the same place you’re running this command).
-
Then inside the container do a quick update:
sudo apt update -
Install necessary packages:
sudo apt install nginx nodejs npm -y -
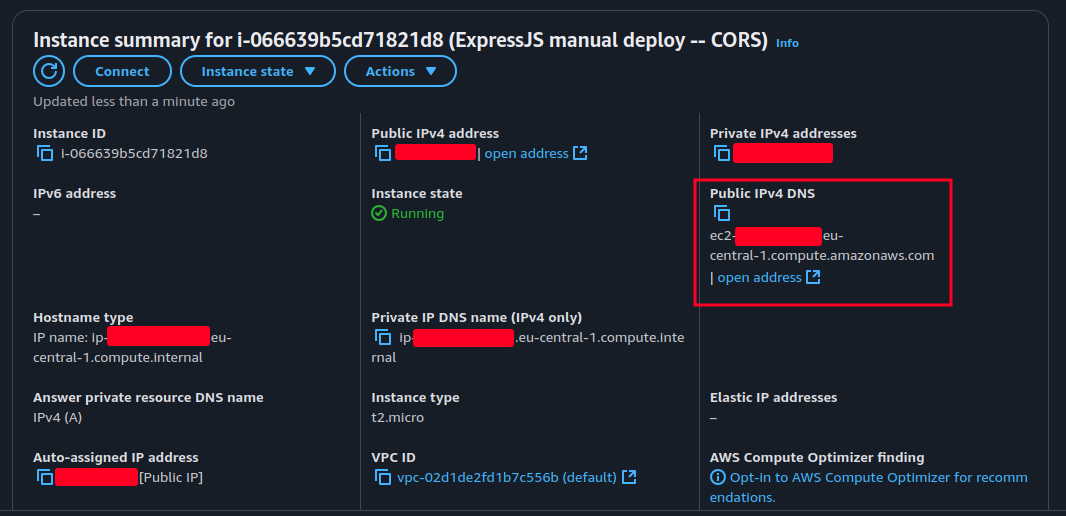
# BTW if you need to access your EC2 instance just go to your instance detailed view page and copy your public IPv4 DNS address and enter it in your browser. Of course since we just installed Nginx in previous step you should see Nginx welcome page.
-
Install
nglobally and change your node version to match the one you selected in your GitHub actions:sudo npm i --global n sudo n 22 hash -r # To reload your bash command line so that when you run `node -v` it uses node v22. -
Install
pm2on your EC2 instance globally:sudo npm i --global pm2A few commands you most likely will need while using
pm2-
pm2 flush processName
This will empty the current application logs managed by PM2. -
pm2 logs processName
This will log all the logs of that process. Similar todocker logs containerName -f. -
pm2 start script.js --name processName
This will start a new process with the passed name. -
pm2 delete processName
To delete a process by its name. -
pm2 restart processName
Restarts an existing process.
-
-
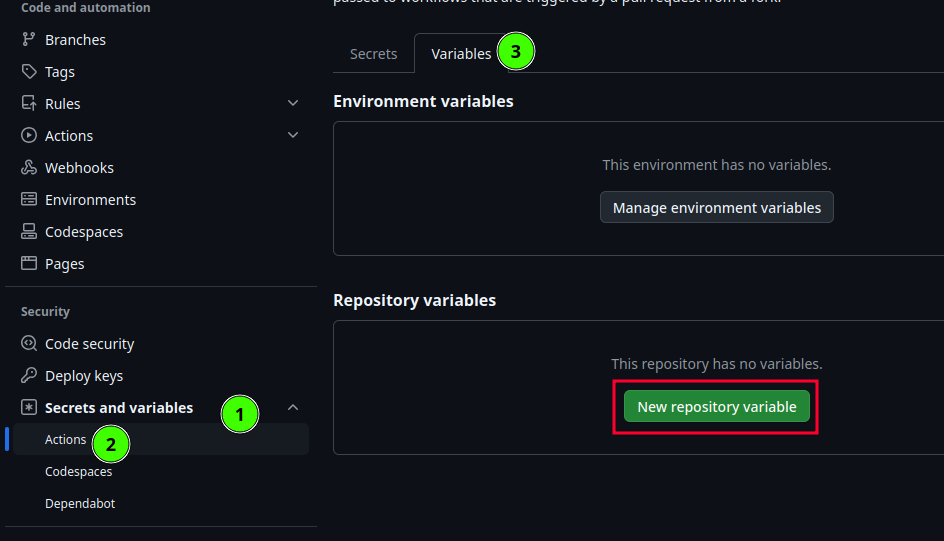
# Create a new variable in your GitHub repo named
FRONTEND_URLand copypaste your “Public IPv4 DNS” as its value:- Go to your repo’s page.
- Open “Settings”.
-
Navigate to “Secrets and variables” in the sidebar on left hand side and click on “Actions”, then switch to “Variables” tab, and finally click on “New repository variable” button:
-
Now we can add a new env variable:
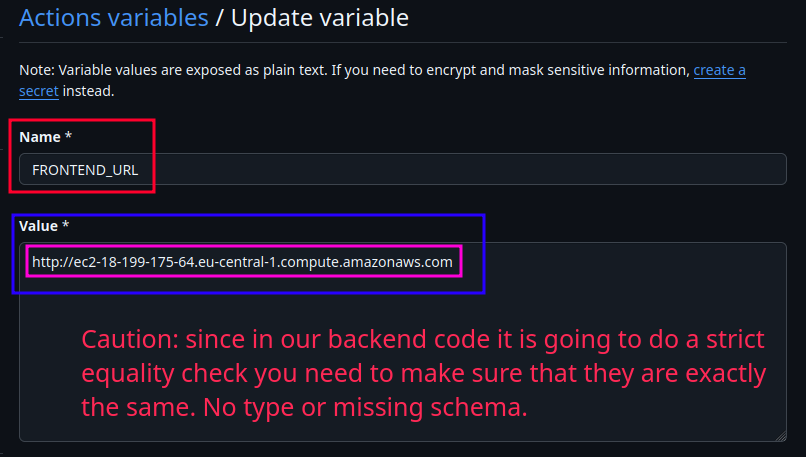
-
Then go to your GitHub repo page and create an action to deploy this project to your EC2 instance:
- Click on “Actions”.
-
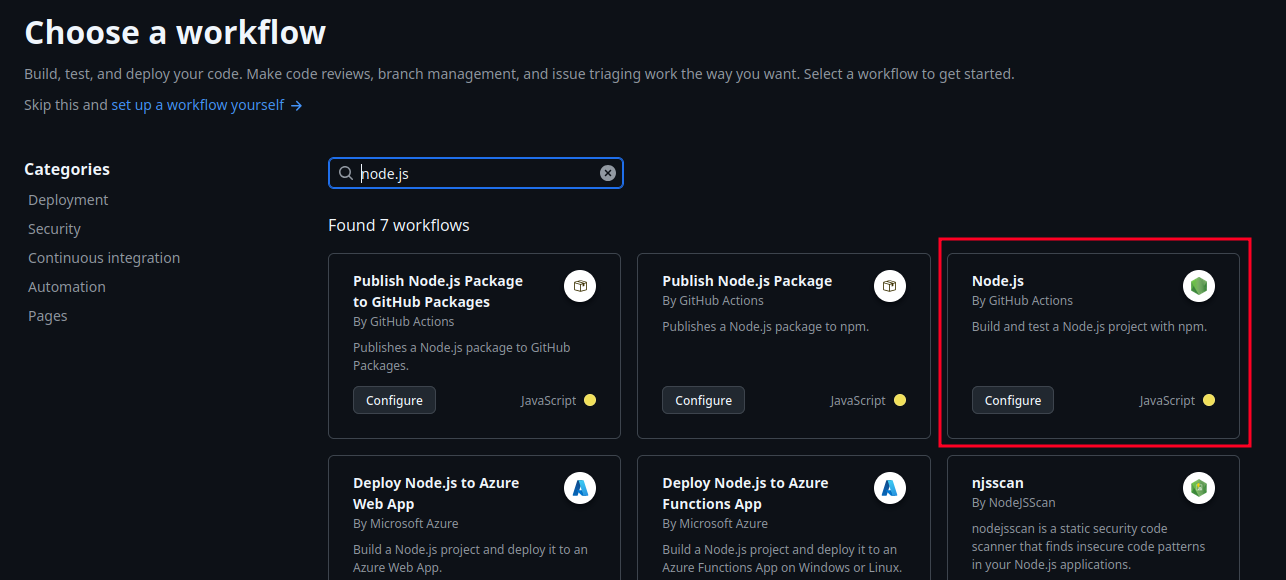
Add a new workflow for your ExpressJS app:
- Search for “node”.
-
Pick the one with “Node.js” name:
-
Modify it the way you like. I am just gonna:
- As the first step we need to do a quick cleanup for both backend and frontend.
-
Remove the on pull request event trigger since I do not need it. Learn more here.
Instead I add
workflow_dispatch:to be able to run this workflow manually too. Just in case.On another note, since the
actions/setup-node@v4will look for apackage-lock.jsonfile in the root of our repo in order to cache the npm installation, and our repo does not have one (it’s a monorepo).Thus we need to specify where is our
package-lock.json. Read more here - Define the default working directory.
- Define a workflow environment variable to prevent duplication.
- Change the runner from
ubuntu-latesttoself-hosted. Indicating our intention of having the steps defined in this workflow to be executed on our EC2 instance. - I just want it to run the steps of jobs in NodeJS version 22. So I removed the other versions.
- Since this is a monorepo we need to change our working directory too.
- I removed the
npm testtoo. -
Start/restart the backend on each deploy + flushing pm2 logs.
Note that we are using
varscontext to access repository level variable we’ve created here as env variable. - Finally move the frontend file to
/var/www/html. This can be also yourbuild/distdirectory.
This is the final product:
name: Self-hosted backend & frontend on: push: branches: ['main'] workflow_dispatch: defaults: run: working-directory: ./deploying-exercises/expressjs-cors/backend env: FRONTEND_DEST: /var/www/html jobs: build: runs-on: self-hosted strategy: matrix: node-version: [22.x] # See supported Node.js release schedule at https://nodejs.org/en/about/releases/ steps: - name: Cleanup $ run: sudo rm -rf $FRONTEND_DEST - name: Cleanup deploying-exercises/expressjs-cors working-directory: ./deploying-exercises/expressjs-cors run: | ls -la . rm -rf * || true ls -la . - uses: actions/checkout@v4 - name: Use Node.js $ uses: actions/setup-node@v4 with: node-version: $ cache-dependency-path: deploying-exercises/expressjs-cors/backend/package-lock.json cache: 'npm' - run: npm ci - run: npm run build --if-present - run: echo "FRONTEND_URL=$" >> .env - name: Clean old logs of backend continue-on-error: true run: pm2 flush backend - name: Restart the process on each new deploy or start the process if it does not exist run: pm2 restart backend || pm2 start index.js --name backend - name: Move Frontend to $ run: | sudo mv ./frontend $FRONTEND_DEST sudo chown -R root:root $FRONTEND_DEST working-directory: ./deploying-exercises/expressjs-cors - Change the file name to
self-hosted.yml& commit it.
-
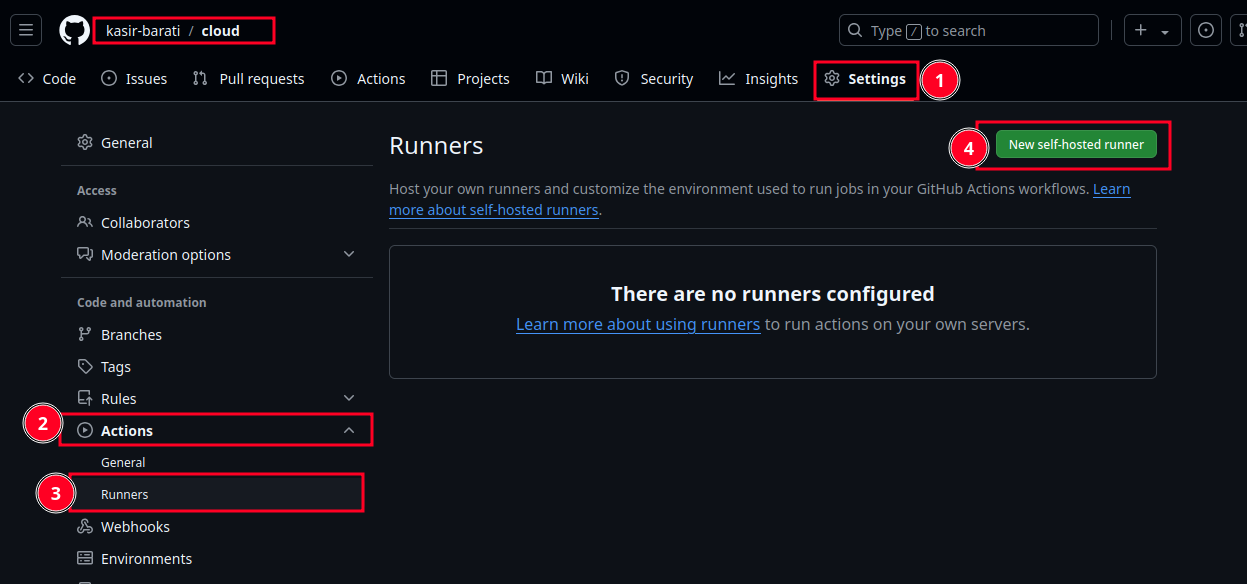
Create a self hosted runner in GitHub:
- To do that got to “Settings” tab in your GitHub repo.
-
On the left, inside the sidebar you click on “Actions” and then “Runners”:
-
In order to have a functional self-hosted runner you need to download, configure, and execute the GitHub Actions Runner. So we need to follow the instructions written down under the “Download” section:
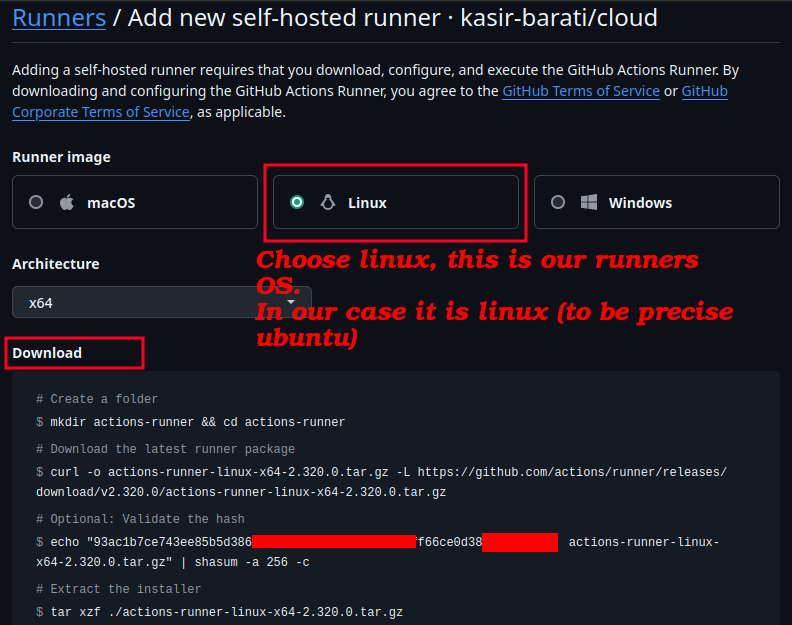
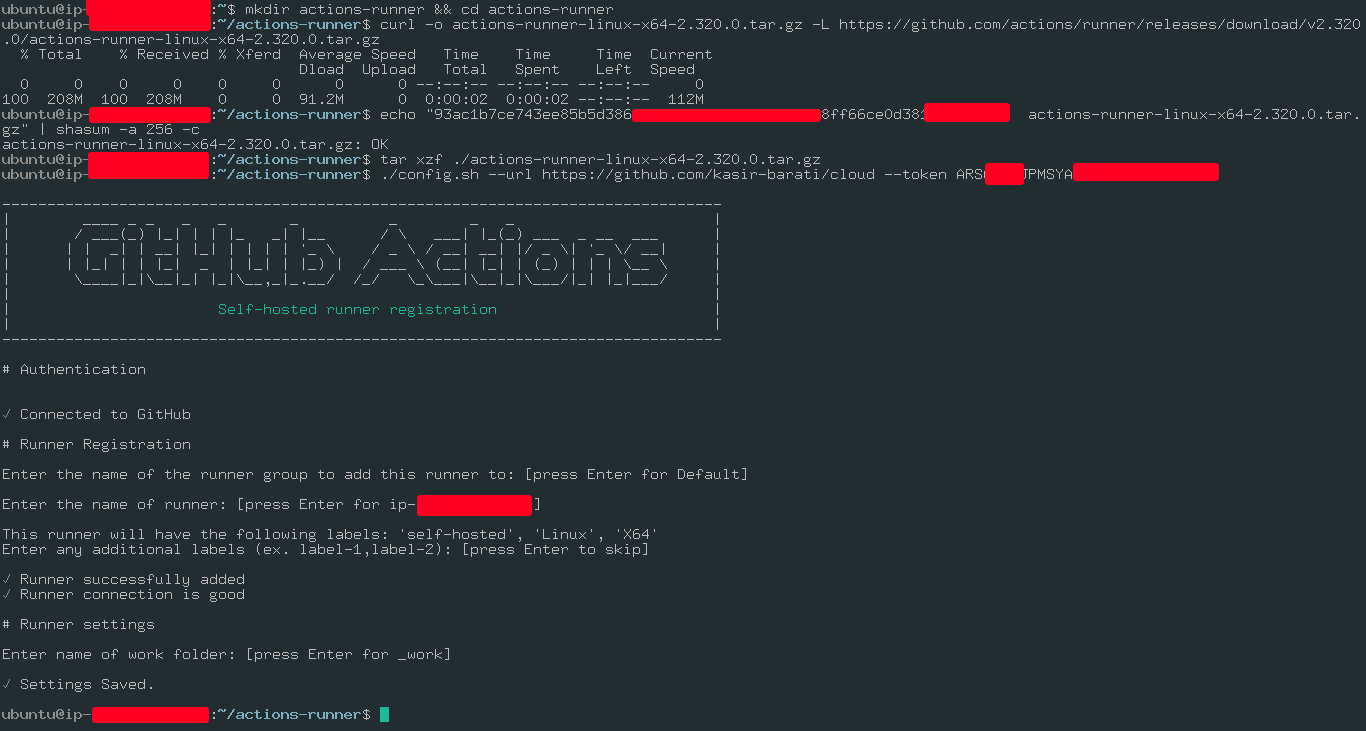
Following those steps:
☝️ Note that we’ve accepted the default path for where our artifacts will be generated and pushed which is
_work. Meaning if you cd into it and runlsyou should be able to see a directory with your repository’s name ☝️.[!CAUTION]
We diverge a little bit since we are on Linux and use
systemd. After we’ve executed./config.sh ...we need to do the following steps: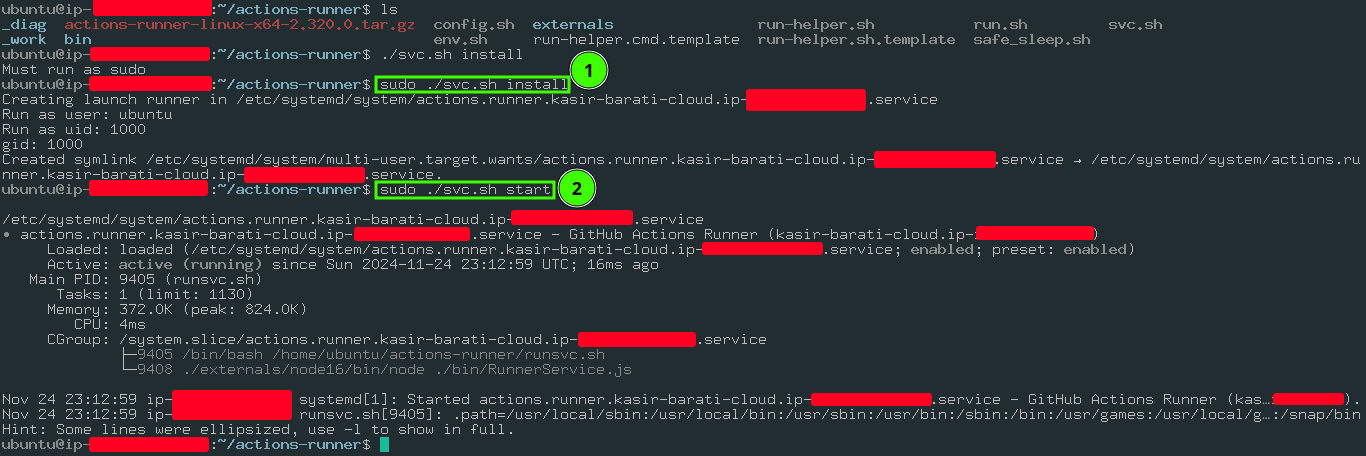
- I tried to follow GitHub’s steps and ran
./run.shbut it did not work. svc.sh:- Set up the self-hosted runner application to run automatically when your machine starts.
- Available on Linux systems with
systemd. svc.shscript has been created after adding the runner.- Use it to install and manage the “runner as a service”:
sudo ./svc.sh installinstalls the service.sudo ./svc.sh startstarts the service.
- I tried to follow GitHub’s steps and ran
-
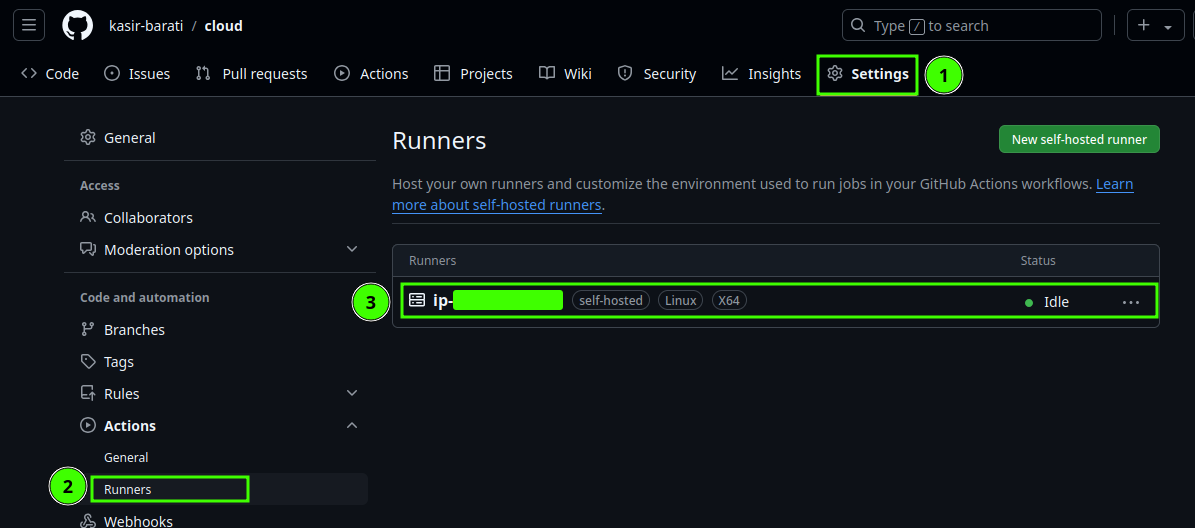
Finally after a couple of minutes if you go back to “Runners” tab in “Settings” you should see something like this:
[!CAUTION]
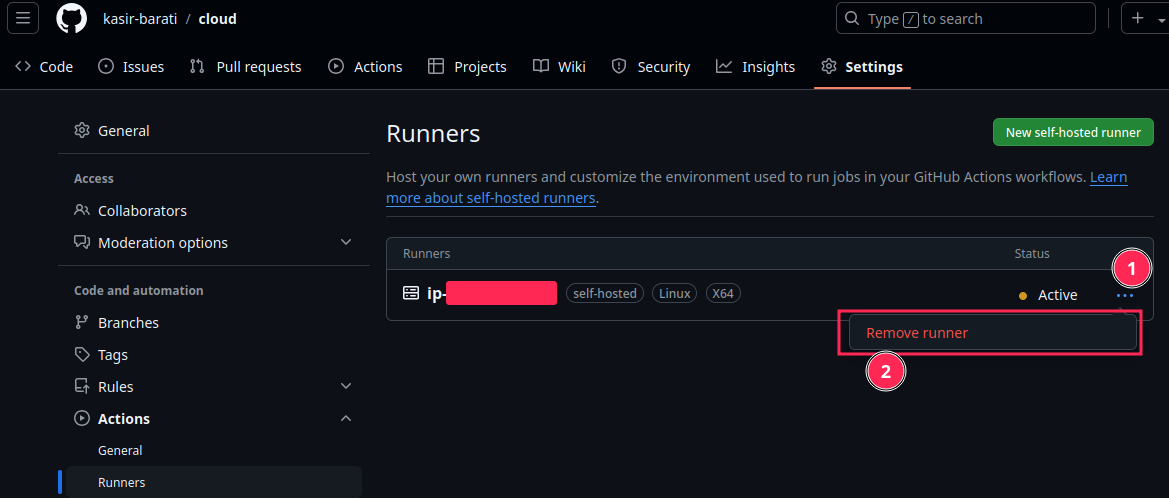
Before removing your EC2 instance it is better to first uninstall the self-hosted runner and let GitHub to do some cleanups. Just go to your GitHub repo and “Settings” tab, click on “Runners” and delete runner.
- Uninstall your runner service via:
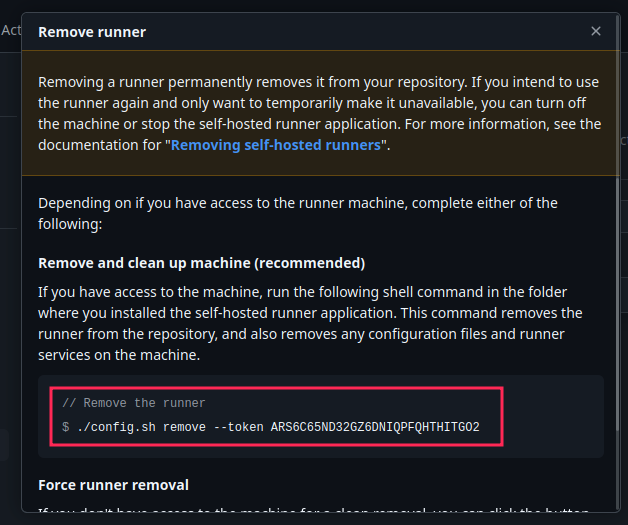
sudo ./svc.sh uninstall- After that navigate to “Settings” tab in your GitHub repo:
- Then copypaste the command in your server:
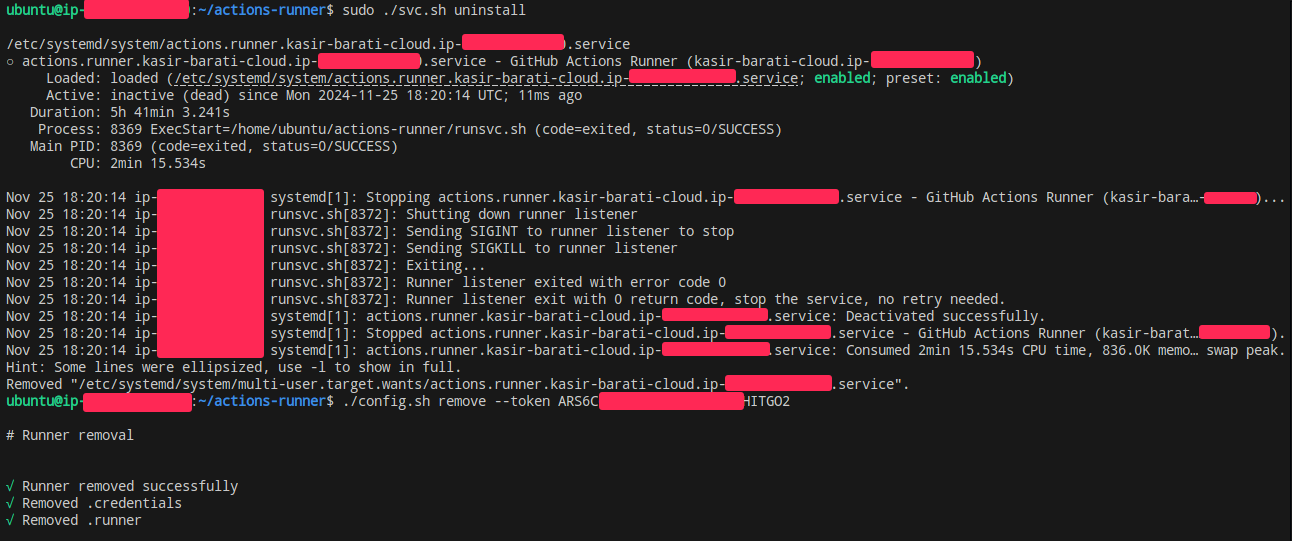
After doing those steps you should see something like this in your terminal, as you can see we are inside the same directory we started our self-hosted configuration process:
And now if you go to the same tab where it was showing you your self-hosted runner you’ll see that it is not listed there anymore :hooray:.
But if for some reason you cannot do it just force delete it, in that same popup just scroll down a little bit and you can see the button:
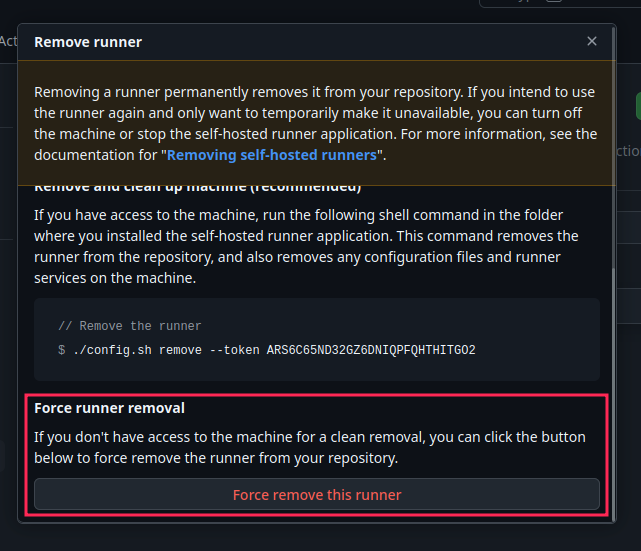
-
Now it is time to move on and configure our Nginx to show our frontend app:
-
sudo nano /etc/nginx/sites-available/defaultAdd a
locationblock directive for the backend right afterserver_name *;+ not seeing noisy logs aboutfavicon.icoorrobots.txt:location = /favicon.ico { log_not_found off; access_log off; } location = /robots.txt { log_not_found off; access_log off; allow all; } location /api/ { proxy_pass http://localhost:3000; proxy_set_header Host $host; proxy_set_header X-Real-IP $remote_addr; proxy_set_header X-Forwarded-For $proxy_add_x_forwarded_for; }[!CAUTION]
Keep your
APP_PORTnumber in your backend app’s env variable in line with the number entered here. Worth mentioning that its default value is 3000. -
Save changes and then reload Nginx:
sudo systemctl reload nginx[!NOTE]
Note that I do not like restarting this service since if you’ve made any sort of mistake reload will yell at you and won’t kill the old process unless it is sure there is no syntax error in your nginx config file.
-
404 – Nginx issue
- Check whether I can access my backend.
- Check the
systemctllogs for nginx:sudo systemctl status nginx. - Check Nginx logs:
cat /var/log/nginx/error.log. -
Checked the current
chmod: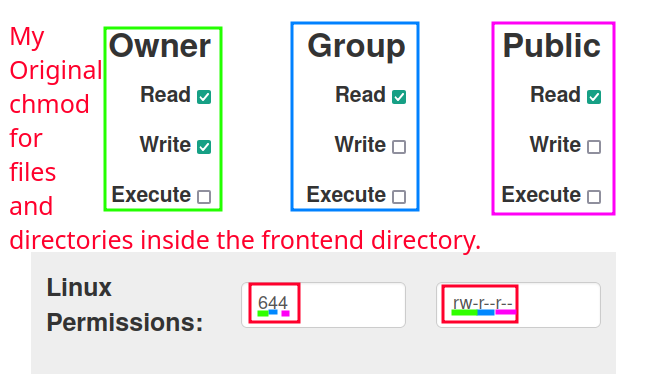
-
sudo chmod -R 0755 frontenddid not help! I also tried to change it to 777 bu no luck. I did not go too crazy about it as to changing the whole path permissions:/home/ubuntu/actions-runner/_work/cloud/cloud/deploying-exercises/expressjs-cors.
-
Next I tried to change their group:
sudo chown -R "$USER":www-databut it did not work. Thus I decided to try a completely different approach, moving my frontend code to/var/www/htmland changing its permissions + groups in a step in my GitHub workflow.And this solution actually worked, so here is what I did:
- Change
rootdirective in my Nginx config back toroot /var/www/html. - Removed everything inside it and moved my frontend app into it instead + changing ownership too. This was done via GitHub actions, see this to see all changes in one place.
- Change
[!CAUTION]
- Do NOT try to resort to
chmod 777. But if you’re just trying to make sure that is not causing you this issue it is fine.- Sometime you need to do a hard refresh in your browser + restarting Nginx on your server.
- About
chmodyou need to keep in mind that the whole full path to your final folder must be accessible!
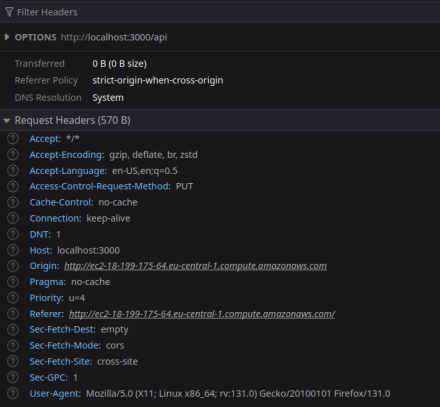
Cross-Origin Request Blocked: The Same Origin Policy disallows reading the remote resource at http://localhost:3000/api. (Reason: CORS request did not succeed). Status code: (null).
This was happening because my fake frontend app I am making call to http://localhost:3000/api. Yes, I just realized that this JS code is being executed in end user’s browser. On their machines and not in EC2 instance up on the server. I just for a sec confused it with NextJS’s SSR feature.
In other word:
- My configuration for server was correct.
- My configuration for Nginx was correct.
- My configuration for ExpressJS was correct.
I just forget a simple fact :kidding:.